Placing Multiple Orders
2012
In this demonstration you learn how to place multiple orders from different clinical categories.
You will now place the following three orders for your patient; a Nurse Communication, a Physician Consult, and a Chest X-Ray, considering the patient presented complaining of chest pain. Entering multiple orders at once saves you time by allowing you to enter several orders while only signing once.
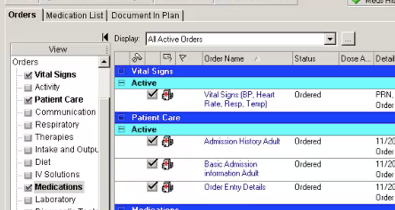
Your patient’s chart is opened to the Orders view.
1. Click the Add button to begin placing the orders.
2. Type communication in the Find box.
3. Select Communication Order.
Remember, you know the orderable is selected when it turns blue and bolds.
Order Sentence pop-up windows allow you to select the closest sentence to save time later by simply modifying the details. In this case, select None.
Multiple orders can be placed while the Add Order window is open. You will place the other two lab orders before closing the window.
4. Type physician in the Find box.
5. Select Physician Consult.
6. Returning to the Find box, type chest.
7. Select Chest 1 View XR. Select None from the pop-up Order Sentence window.
8. You are finished finding orders, click Done to close the Add Order window.
The three orders are listed on the Order’s scratch pad.
9. Click over the order for the Chest X-Ray to open the details window.
Yellow bold items in the Order Details screen designate required details. These details must be filled in for the order to be processed. Fill in the appropriate selection indicating the Reason for Exam.
10. Click the down arrow next to Reason for Exam to view detail options.
11. Select Pain.
Indicate the preferred mode of transportation. Select Wheelchair.
After you have filled in the missing required details for the Chest X-Ray order,
12. Click to select the Nurse Communication order.
Notice the Detail Window updates and changes for the new order.
13. Click the Order Comments tab and enter, Call Dr. when patient’s family arrives.
14. Click to select the Physician Consults order.
15. Click the binoculars icon next to Consulting Physician field.
The Provider Selection window is now open.
16. Enter Physician in the Last Name field and press Enter.
17. Select Physician, Ed and click OK.
Returning to the Order Details window:
18. Enter Physician ordered for Reason for Consult.
19. In the Special Instructions field type evaluate CHF.
Entering the Physician consult order does not replace the good practice of calling to notify the consulting physician that he has a new patient. However entering this order does automatically place this patient on his rounding list to facilitate easily finding the patient.
20. Click Sign.
Remember you must refresh the view to see Ordered in the status.
21. Click Refresh.
The orders are placed under the appropriate clinical categories.
You have completed this demonstration; please click Next to proceed to the next lesson.
10 Multiple Orders
10:03 AM
PowerChart offers a user view that is similar to paper-based systems and provides a comprehensive record of medication administration activities.

